Welcome to the ultimate guide on how to make stunning coffee art with milk. Discover the secrets to creating beautiful designs in your latte that will impress friends and family alike. With a little practice and the right techniques, you’ll be able to transform your morning coffee into a work of art.
- Mastering coffee art with milk requires specific equipment and techniques.
- An espresso machine with a steaming wand is essential for creating the perfect microfoam.
- Using whole milk produces the highest quality microfoam, resulting in better latte art.
- Steaming the milk to the right temperature and texture is crucial for achieving desired results.
- When pouring the milk into the espresso, start from the center and focus on creating smooth and even patterns.
Now that you have been introduced to the art of coffee with milk, let’s dive deeper into the charm and techniques in the upcoming sections. Get ready to impress with your newfound skills!
The Charm of Coffee Art with Milk
There’s something magical about sipping a perfectly crafted latte with a mesmerizing design swirled on top. Coffee art with milk allows you to transform an ordinary cup of joe into a canvas for your creativity. Whether you’re a coffee lover looking to impress your friends or a barista in training, mastering the art of creating beautiful designs with milk is a skill worth pursuing.
One of the reasons coffee art with milk has gained such popularity is its ability to add a touch of elegance and sophistication to a simple cup of coffee. The intricate patterns and designs, ranging from classic hearts and rosettas to more complex creations, can make every coffee experience feel like a work of art. With just a few simple techniques, you can elevate your morning routine and delight yourself or others with your latte masterpieces.
To create stunning coffee art with milk, it’s important to understand the various techniques involved. From achieving the perfect microfoam to mastering the technique of pouring, each step plays a crucial role in creating the desired patterns and designs. With practice and patience, you can learn how to create even and smooth milk patterns that will impress both yourself and those lucky enough to enjoy your creations. And don’t be afraid to experiment and add your own personal touch to each latte art design!

| Design | Description |
|---|---|
| Heart | A classic and simple design, created by pouring milk into the center and dragging a toothpick or skewer through the milk. |
| Rosetta | A more complex design resembling a fern leaf, created by pouring milk in a circular motion and using a toothpick or skewer to draw lines through the milk. |
| Tulip | A visually striking design resembling a tulip, created by layering milk on top of the espresso in a specific pattern and using a toothpick or skewer to create the desired shape. |
Remember, the key to mastering coffee art with milk is practice. Don’t get discouraged if your first attempts don’t turn out exactly as you envision. Like any skill, creating beautiful latte art takes time and dedication. Embrace the learning process and continue experimenting with different techniques and designs. With persistence, you’ll be able to create stunning coffee art that not only looks incredible but also adds an extra layer of enjoyment to each cup of coffee you make.
Essential Equipment and Ingredients
Before diving into the world of coffee art, it’s important to have the right tools at your disposal. To create stunning designs, you’ll need a reliable espresso machine with a steaming wand and high-quality whole milk. The espresso machine should have the capability to generate enough steam pressure for steaming milk and a wand that allows for precise control of the steam flow. This will ensure that you can achieve the right texture and temperature for your milk.
Using whole milk is essential for creating the best microfoam. The fat content in whole milk contributes to the richness and smoothness of the foam, allowing for more intricate designs. Skim or low-fat milk may not produce the same quality of foam, so it’s best to stick with whole milk.
To create latte art, you’ll also need a stainless steel milk pitcher with a narrow spout. This will give you better control when pouring the milk into the espresso. The narrow spout allows for more precision and helps in creating intricate patterns.
The Importance of Whole Milk
Whole milk is the preferred choice for creating coffee art due to its higher fat content. The fat helps stabilize the milk foam, resulting in a smoother and glossier texture. The protein content in whole milk also contributes to the overall structure of the foam, allowing for better definition and longevity of the design.
When steaming the milk, it’s important to heat it to the right temperature. The ideal range for steaming milk is between 140-160°F (60-71°C). This ensures that the milk is hot enough to blend well with the espresso but not too hot to scorch or alter the flavor.
To achieve the desired microfoam, start by purging the steam wand to release any built-up water. Submerge the steam wand just below the surface of the milk and turn on the steam. Position the pitcher at an angle, allowing the steam to create a whirlpool effect. This will help incorporate air into the milk, creating a velvety and creamy texture.
Remember to keep practicing and experimenting to improve your coffee art skills. With time and patience, you’ll be able to create beautiful designs that will impress your friends and elevate your coffee-drinking experience.
| Essential Equipment | Ingredients |
|---|---|
| Espresso machine with a steaming wand | High-quality whole milk |
| Stainless steel milk pitcher with a narrow spout |

Mastering the art of microfoam is key to creating intricate designs in your latte. Let’s walk through the step-by-step process of steaming milk to achieve the perfect microfoam for your latte art creations.
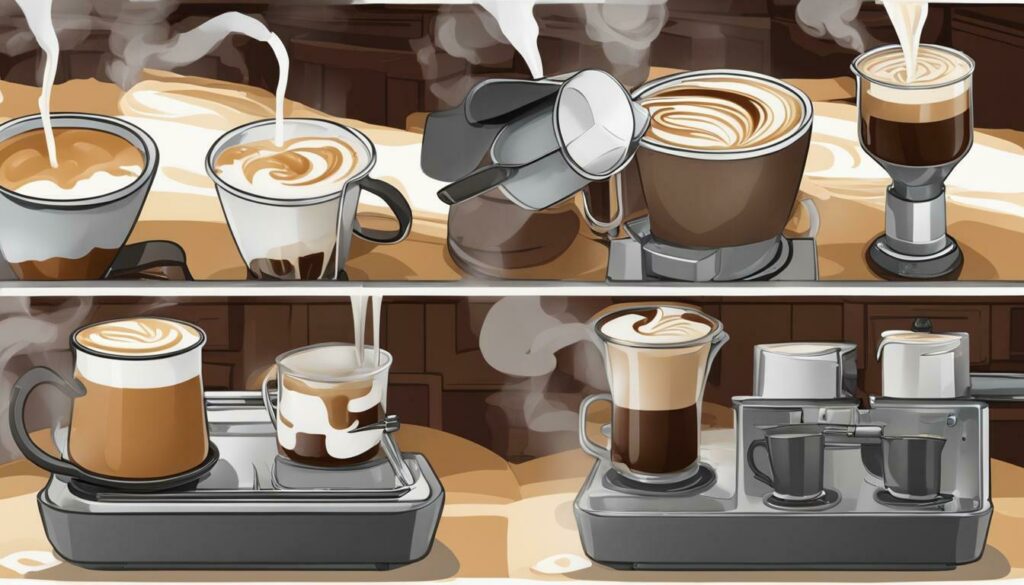
To start, fill your milk pitcher with cold whole milk, ensuring it’s no more than halfway full to leave space for expansion. Place the steam wand just below the surface of the milk, slightly off-center. Turn on the steam and position the steam wand at a slight angle, creating a swirling motion in the milk.
As the milk begins to steam, you’ll notice the texture changing. The goal is to create silky, velvety microfoam with tiny bubbles. Keep the steam wand at the same angle and gradually lower the pitcher as the milk expands. This will help create a consistent texture and temperature.
Once the milk reaches about 140°F (60°C), turn off the steam and remove the pitcher from the wand. Gently tap the bottom of the pitcher on a flat surface to remove any large bubbles and swirl the milk to create a uniform texture. Your microfoam is now ready to be poured onto your espresso canvas!
The Technique of Pouring
Now that you have the perfect microfoam, it’s time to put your pouring technique to the test. Learn the art of pouring, starting from the center, and watch as mesmerizing patterns emerge in your latte.
Pouring the milk into the espresso is where the magic happens. It’s important to pour from a moderate height and maintain a steady and controlled speed. This will ensure that the milk blends seamlessly with the espresso, creating a beautiful canvas for your latte art.
The Pouring Process:
- Start by pouring the milk into the center of the espresso cup.
- As the cup fills, gradually move your pouring hand backward, creating a controlled stream of milk.
- Once the cup is nearly full, raise the pitcher slightly to create a thin white line on the surface.
- As you near the end of pouring, gently move the pitcher from side to side in a quick, sweeping motion to create additional patterns.
Remember, patience and practice are key to mastering the pouring technique. It may take a few tries to achieve the desired results, but don’t be discouraged. Each attempt is an opportunity to refine your skills and create your own unique coffee art.

Creating latte art requires precision and creativity. Pouring the milk with a steady hand and experimenting with different techniques will allow you to develop your own signature style. Don’t be afraid to try new patterns or incorporate personal touches into your designs. The possibilities are endless!
Next, we will explore the various patterns and designs you can create using milk in your coffee. From classic hearts to intricate rosettas, you’ll discover the artistry behind each design and learn how to bring them to life in your cup. Stay tuned for more inspiration and tips in our beginner’s tutorial for coffee art.
Creating Beautiful Patterns
Let your creativity shine through by mastering various patterns and designs. We’ll reveal the techniques behind creating hearts, rosettas, and other stunning patterns that will elevate your latte game.
Creating coffee art with milk is like painting on a blank canvas. The key is to start with a solid foundation of perfectly steamed milk. The microfoam should be velvety smooth and have a glossy sheen. This will allow you to create intricate designs with ease.
One popular pattern is the heart. To create this design, start by pouring a small circle in the center of your espresso. Then, while pouring gently, move the pitcher back and forth in a controlled motion to create two rounded edges on the sides of the circle, resembling the shape of a heart.
Another common design is the rosetta. To achieve this pattern, begin by pouring a thin stream of milk into the center of the cup. As the milk begins to mix with the espresso, move the pitcher side to side, creating a delicate leaf-like shape. Once you reach the edge of the cup, quickly and smoothly drag the stream back through the center, creating a beautiful, symmetrical design.
| Coffee Art Technique | Description |
|---|---|
| Heart | Pour a small circle in the center of the espresso, then move the pitcher back and forth to create two rounded edges on the sides, forming a heart shape. |
| Rosetta | Pour a thin stream of milk into the center of the cup, moving the pitcher side to side to create a leaf-like shape. Drag the stream back through the center to complete the design. |
| Swirl | Pour the milk in the center of the cup, then quickly and smoothly swirl the pitcher in a circular motion to create a mesmerizing spiral pattern. |
These examples are just the beginning. With practice and experimentation, you can create a wide range of impressive patterns and designs. Don’t be afraid to let your imagination run wild and try new techniques. The possibilities are endless, and each cup of coffee can become a work of art.

Like any art form, coffee art with milk requires practice and dedication. Embrace the learning process, experiment with different techniques, and watch your latte art skills evolve with each cup you create. With time and practice, you’ll develop the ability to steam milk to the perfect temperature and texture, creating the ideal canvas for your designs.
One way to improve your skills is to focus on pouring techniques. Start by pouring from the center of the cup and maintaining a steady flow. This helps create even and smooth patterns in your coffee art. You can also experiment with pouring at different heights and speeds to achieve different effects. Remember, practice is essential, so keep refining your pouring technique until you achieve the desired results.
Another aspect to consider is the creation of beautiful patterns. Once you’ve mastered the basics of pouring, you can explore a variety of designs, such as hearts, rosettas, and more intricate patterns. The key is to pour with confidence and precision, allowing the milk to blend seamlessly with the coffee. Remember to start with simple designs and gradually progress to more complex ones as you gain confidence in your skills.
| Coffee Art Techniques | Description |
|---|---|
| Hearts | A classic design created by pouring milk in a heart shape. |
| Rosettas | A more intricate pattern resembling a flower or fern, created by pouring milk in a circular motion while moving the cup. |
| Etching | Using a fine-tipped tool to draw designs or write words on the surface of the coffee foam. |
Remember, the key to becoming proficient in coffee art with milk is practice. Take the time to experiment with different techniques, learn from your mistakes, and don’t be afraid to try new things. Each cup you create is an opportunity to hone your skills and express your creativity. So, grab your favorite mug, a steamy cup of espresso, and let your artistic journey begin!

Your coffee art creations deserve to be showcased and admired. Discover how to capture the perfect photo of your latte art and share it with the world, spreading inspiration one cup at a time.
When it comes to capturing the beauty of your coffee art, lighting is key. Find a well-lit area near a window or use natural light to enhance the colors and details of your design. If you’re shooting indoors, consider using a ring light or a small lamp to add extra brightness to your shot.
When positioning your camera or smartphone, experiment with different angles to find the most flattering view of your latte art. Try a top-down angle to capture the entire design or get creative with a close-up shot to highlight the intricate details. Remember to focus on the center of the cup where the art is showcased.
“Latte art is a visual treat, so make sure your photo does justice to the craftsmanship. Experiment with different compositions and perspectives to capture the essence of your design.” – Coffee enthusiast
Once you’ve captured the perfect photo, it’s time to share your latte art with the world. Post it on your favorite social media platforms, such as Instagram or Facebook, and use relevant hashtags like #coffeeart or #latteart to reach a wider audience. Engage with other coffee lovers and artists by commenting on their posts and joining latte art communities where you can share tips and tricks.
Remember, the most important part of showcasing your latte art is to have fun and enjoy the process. Experiment with different patterns, colors, and techniques to create unique designs that reflect your creativity. With practice, your coffee art will continue to improve, and you’ll inspire others to explore the artistry of latte making.

| Tips for Showcasing Your Latte Art |
|---|
| Find a well-lit area to enhance the colors and details of your design. |
| Experiment with different angles to find the most flattering view of your latte art. |
| Use hashtags like #coffeeart or #latteart to reach a wider audience on social media. |
| Engage with other coffee lovers and artists in latte art communities to share tips and tricks. |
| Have fun and embrace your creativity as you continue to improve your coffee art skills. |
Conclusion
Congratulations on completing this comprehensive beginner’s guide to coffee art with milk. Armed with the knowledge and techniques shared here, you’re now ready to embark on a journey of creating captivating designs in your morning cup of joe.
Mastering latte art requires specific equipment, such as an espresso machine with a steaming wand, and the right technique to achieve the perfect microfoam. Whole milk is recommended for the best results, as it creates the highest quality microfoam. The process involves steaming the milk to the right temperature and texture, then pouring it into the espresso, starting from the center. It’s important to pour at the right height and speed, and to focus on creating even and smooth milk patterns.
Remember, practice and experimentation are key to mastering latte art. Don’t be discouraged if your first attempts don’t turn out as desired. Keep practicing and refining your skills, and you’ll soon be able to create beautiful patterns and designs with ease.
So go ahead, gather your equipment, get some fresh whole milk, and start practicing. With every cup of coffee, you’ll have the opportunity to express your creativity and impress your friends and loved ones. Enjoy the process, and savor the satisfaction of creating your own coffee art masterpiece!
FAQ
Q: What equipment do I need to create coffee art with milk?
A: To create coffee art with milk, you will need an espresso machine with a steaming wand. This allows you to steam the milk to the right temperature and texture.
Q: What kind of milk should I use for the best results?
A: Whole milk is recommended for the best results when creating coffee art with milk. It creates the highest quality microfoam, which is essential for achieving intricate designs.
Q: How do I achieve the perfect microfoam?
A: To achieve the perfect microfoam, you need to steam the milk to the right temperature and texture. This involves introducing steam into the milk while holding the steaming wand just below the surface. Aim for a smooth, velvety texture.
Q: What is the technique for pouring the milk into the espresso?
A: When pouring the milk into the espresso, start from the center and pour at a steady, controlled speed. This ensures even distribution and helps create beautiful patterns in your coffee art.
Q: How can I create different patterns and designs with milk?
A: To create different patterns and designs with milk, you can experiment with pouring techniques. Try pouring in a circular motion to create rosettas, or use a toothpick to draw designs on the surface of the milk foam. The possibilities are endless!
Q: What is the key to mastering coffee art with milk?
A: The key to mastering coffee art with milk is practice and experimentation. Don’t be afraid to try new techniques and designs. With time and practice, you’ll improve your skills and create stunning latte art.
