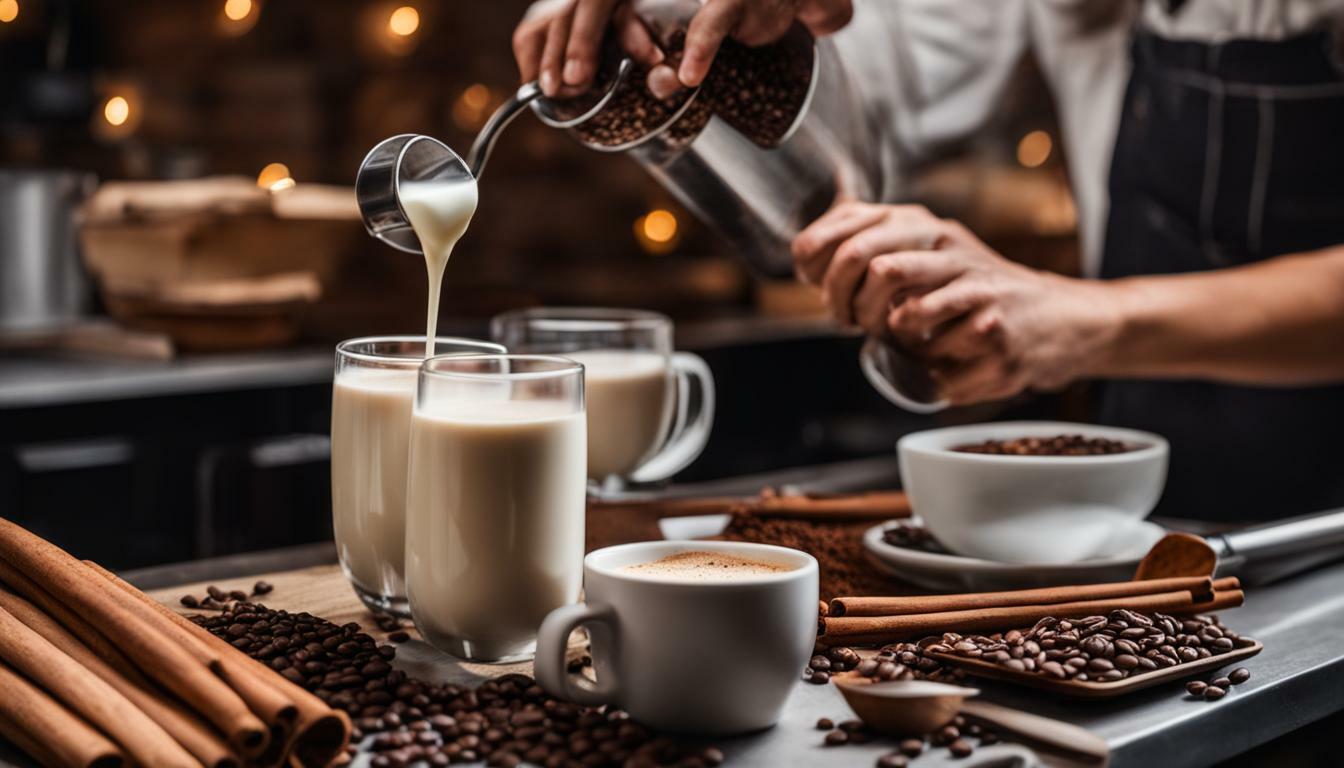
Making cold foam at home is easier than you think, and with this step-by-step guide, you’ll be able to create the perfect velvety topping for your homemade brews. Cold foam is a frothy and velvety topping that adds a luxurious touch to cold coffee drinks. It is made by frothing nonfat milk without the use of heat or steam. Skim milk works best for creating a thick and creamy foam due to its higher protein content. Plant-based milks can also be used, but the results may vary.
To make cold foam at home, you’ll need cold, fresh milk and a milk frother. Other tools like a French press or a whisk can also be used, but they may not yield the same results. Simply froth the milk until it reaches the desired consistency, and you’ll have creamy cold foam ready to enhance your favorite beverages.
Flavor variations can be added to the cold foam using extracts or syrups. Whether you prefer a hint of vanilla, a touch of caramel, or a burst of fruity flavor, you can easily customize your cold foam to suit your taste preferences. Cold foam can be used to top a variety of drinks, including iced coffee, cold brew, iced tea, and more.
Key Takeaways:
- Making cold foam at home is easy and requires cold, fresh milk and a milk frother.
- Skim milk works best for creating a thick and creamy foam due to its higher protein content.
- Plant-based milks can be used, but the results may vary.
- Cold foam can be flavored with extracts or syrups to add a personalized touch.
- Cold foam can be used to top a variety of cold beverages, including iced coffee, cold brew, and iced tea.
What is Cold Foam and Why is it Popular?
Cold foam is a decadent topping made from frothing nonfat milk, resulting in a velvety and frothy texture that enhances the flavors of cold coffee drinks. It adds a touch of luxury and indulgence to any cold beverage, taking it to a whole new level of deliciousness. With its creamy consistency and frothy appearance, cold foam has become a popular choice among coffee lovers worldwide.
One of the reasons why cold foam has gained such popularity is its ability to create a delightful contrast of textures when paired with iced coffee or cold brew. The smooth and creamy foam adds a light and airy element to the drink, elevating the overall experience. It creates a visually appealing presentation as well, with its frothy appearance resting on top of the beverage.
Moreover, cold foam enhances the flavor profile of cold coffee drinks. It adds a subtle sweetness to balance the acidity of the coffee, creating a harmonious taste. The velvety texture of the foam also provides a pleasant mouthfeel, making each sip more enjoyable.
| Benefits of Cold Foam |
|---|
| Enhances the flavors of cold coffee drinks |
| Creates a delightful contrast of textures |
| Visually appealing presentation |
| Adds a touch of luxury and indulgence |
The Importance of Fresh and Cold Milk
To create the perfect cold foam, it’s essential to start with fresh and cold milk, as these factors greatly affect the final texture and taste. Fresh milk ensures optimal foam consistency, while cold milk helps to achieve that velvety smoothness we all desire. Let’s explore why these factors are crucial when making homemade cold foam.
When it comes to making cold foam, using fresh milk is key. Fresher milk tends to have a higher protein content, which results in a thicker and creamier foam. The proteins in milk help to stabilize the foam, creating those delicate, airy bubbles that make cold foam so delightful. So, be sure to check the expiration date and choose the freshest milk possible.
Additionally, chilling the milk beforehand is important to achieve the best results. Cold milk froths more effectively and maintains its temperature, allowing for better foam consistency. You can simply refrigerate the milk for a few hours or use chilled milk straight from the fridge. By starting with fresh and cold milk, you’re setting the foundation for a superior cold foam experience.
The Necessity of a Milk Frother
While fresh and cold milk are essential, having the right tools is equally important. A milk frother is highly recommended for creating the perfect cold foam. This handy device aerates the milk, creating that frothy texture we love. It saves you time and effort, producing consistent results every time.
A milk frother works by rapidly spinning a whisk-like attachment through the milk, introducing air and creating foam. It provides the ideal balance of air and liquid, resulting in a creamy and luxurious topping. Whether you’re a coffee enthusiast or simply enjoy treating yourself to a fancy beverage at home, investing in a milk frother will elevate your cold foam game.
| Benefits of Using a Milk Frother |
|---|
| Consistent and even foam |
| Effortless and convenient |
| Ability to customize foam density |
| Quick and efficient |
While a milk frother is the preferred tool for making cold foam, alternatives such as a French press or a whisk can also be used. However, keep in mind that these alternatives may not achieve the same level of foam consistency. The choice of tool ultimately depends on your personal preference and the resources available to you.
In conclusion, fresh and cold milk, along with a milk frother or alternative tool, are essential elements in mastering the art of making cold foam at home. By starting with these foundational components, you can enjoy the velvety goodness of homemade cold foam in your favorite beverages. So, grab your milk frother, chill that milk, and get ready to indulge in cafe-quality drinks right from the comfort of your own kitchen.
Choosing the Right Milk for Cold Foam
While skim milk is the preferred option for achieving a rich and creamy foam, plant-based milks can also be used with some experimentation to find the right consistency. Skim milk contains a higher protein content, which helps create a thicker and more velvety foam. The proteins in the milk form a network that traps air bubbles, giving the foam its frothy texture.
If you prefer a dairy-free alternative, plant-based milks like almond, oat, or soy can be used. However, it’s important to note that the results may vary. Plant-based milks have different compositions and may not produce the same level of foam as skim milk. It may take some trial and error to find the right brand or type of plant-based milk that froths well.
“The proteins in skim milk form a network that traps air bubbles, giving the foam its frothy texture.”
To achieve the best results with any milk, it’s vital to use cold and fresh milk. Freshness ensures that the milk’s proteins are intact and able to create the desired foam structure. For optimal foam production, it’s recommended to chill the milk in the refrigerator before frothing. Cold milk froths more efficiently and yields a denser and creamier foam. Additionally, using a milk frother or another suitable tool will help incorporate air into the milk, resulting in a light and airy foam.
| Milk Type | Protein Content | Foam Consistency |
|---|---|---|
| Skim Milk | 8g per cup | Thick and velvety |
| Almond Milk | 1g per cup | Light and less dense |
| Oat Milk | 4g per cup | Variable, depending on brand |
| Soy Milk | 8g per cup | Similar to skim milk |
Experimenting with Plant-Based Milks
If you’re keen to use plant-based milks for your cold foam but are unsure where to start, here are some recommendations:
- Almond milk: Look for brands with higher protein content or specifically labeled for frothing.
- Oat milk: Opt for barista or frothing versions, as they are designed to produce foam.
- Soy milk: Choose unsweetened varieties without additives for better foam stability.
Remember, achieving the perfect cold foam with plant-based milks may require some experimentation and adjustments to your frothing technique. Each milk type reacts differently to frothing, so don’t be discouraged if it takes a few tries to find the right balance. Enjoy the process of experimenting and discovering the ideal plant-based milk for your homemade cold foam.
Tools for Making Cold Foam
While a milk frother is the ideal tool for creating cold foam, there are other options such as a French press or a whisk that can be used to achieve a similar effect. The key is to have a tool that can introduce air into the cold milk, creating the desired frothy and velvety texture.
A milk frother is specifically designed for frothing milk and is the easiest and most efficient tool for making cold foam at home. It works by whisking the milk rapidly, incorporating air and creating a creamy foam. With a milk frother, you can achieve consistent results every time.
If you don’t have a milk frother, you can use a French press as an alternative. Start by adding cold milk to the French press (about halfway full), then insert the plunger and pump it up and down vigorously for about 30-60 seconds. This motion will create air bubbles and froth the milk, resulting in a similar texture to cold foam.
Another option is to use a whisk. Begin by pouring cold milk into a mixing bowl or a wide-mouthed container. Use a whisk to vigorously whisk the milk in a circular motion until it becomes frothy and doubles in volume. This method may require some practice to achieve the desired foam consistency, but it can still yield satisfactory results.
| Tool | Pros | Cons |
|---|---|---|
| Milk Frother | Easy to use, consistent results | Requires a specific tool |
| French Press | Accessible, can create similar results | May not be as efficient or consistent |
| Whisk | Common kitchen tool, can produce frothy milk | May require more effort and practice |
When using a French press or a whisk, it’s important to keep in mind that the results may not be as consistent as with a milk frother. The quality of the cold foam may vary depending on your technique and the specific tools used. However, with practice and experimentation, you can still achieve satisfying results and enjoy the frothy goodness of homemade cold foam.
Adding Flavor Variations to Cold Foam
Elevate the flavor of your cold foam by incorporating extracts or syrups that complement your favorite cold beverages. By experimenting with different flavors, you can customize your cold foam to suit your taste preferences and create a truly unique and indulgent drink experience.
When it comes to flavor variations, extracts and syrups are the perfect choices. Extracts, such as vanilla or almond, add depth and aroma to the foam, enhancing the overall taste of your beverage. Simply add a few drops of your chosen extract to the milk before frothing, ensuring the flavor is evenly distributed throughout the foam.
If you prefer a sweeter option, syrups are an excellent choice. Flavored syrups, like caramel or hazelnut, add a burst of sweetness and can transform your cold foam into a decadent treat. Drizzle the syrup on top of the foam or add it directly to the milk before frothing to infuse the flavor into every sip.
Remember, timing is everything when it comes to adding flavorings to your cold foam. For extracts, incorporate them before frothing the milk to allow the flavors to infuse during the frothing process. Syrups, on the other hand, are best added as a final touch, allowing you to control the intensity of the flavor and create beautiful layers of taste.
| Flavor Variation | Best Pairings |
|---|---|
| Vanilla extract | Iced coffee, chai latte |
| Caramel syrup | Cold brew, iced mocha |
| Hazelnut extract | Iced latte, matcha green tea |
Experimenting with different flavor variations is the key to creating a truly personalized and delicious cold foam experience. From classic vanilla to indulgent caramel, the possibilities are endless. Remember to have fun and let your taste buds guide you as you explore the world of flavor-infused cold foam.
Get Creative with Your Cold Foam
Don’t be afraid to get creative and think outside the box when it comes to flavoring your cold foam. Consider using unique extracts like lavender or coconut to add a touch of elegance or tropical flair to your beverages. You can also mix and match syrups to create your own signature flavor combinations. The sky’s the limit!
- Peppermint syrup + chocolate extract = refreshing peppermint mocha
- Raspberry syrup + lemon extract = zesty raspberry lemonade
- Maple syrup + cinnamon extract = cozy maple cinnamon latte
With these flavor variations and creative ideas, you’ll never have a dull sip again. So go ahead, experiment, and enjoy the endless possibilities of flavor-infused cold foam!
Cold Foam Toppings and Pairing Suggestions
Get creative with your cold foam by experimenting with delightful toppings like cocoa powder, cinnamon, or a drizzle of caramel. These toppings not only add visual appeal but also enhance the overall flavor and aroma of your cold foam creations. Here are some tantalizing topping ideas to inspire your next cold beverage:
- Cocoa Powder: Sprinkle a dusting of cocoa powder on top of your cold foam for a touch of chocolatey goodness. It adds a rich and earthy flavor that pairs well with coffee or chocolate-based cold drinks.
- Cinnamon: Add a pinch of ground cinnamon to your cold foam for a warm and comforting note. The sweet and spicy aromas of cinnamon complement the smoothness of the foam and create a cozy flavor profile.
- Caramel Drizzle: Drizzle a luscious swirl of caramel over your cold foam for a decadent treat. The sweet and creamy caramel adds a luxurious touch and pairs beautifully with cold brew or vanilla-flavored drinks.
These are just a few examples, but feel free to mix and match toppings to suit your personal taste preferences. You can also experiment with other ingredients like crushed cookies, flavored syrups, or even a sprinkle of sea salt for a unique twist on traditional cold foam.
Pairing Suggestions
Now that you have mastered the art of making cold foam and have chosen your favorite toppings, it’s time to explore exciting drink pairings. Here are some suggestions to help you create a delightful cold foam experience:
- Iced Coffee: Top your iced coffee with a velvety layer of cold foam and dust it with cocoa powder for a classic and indulgent combination.
- Cold Brew: Enhance the smoothness of cold brew with a dollop of creamy cold foam and a drizzle of caramel – a match made in coffee heaven.
- Iced Tea: Elevate your iced tea by adding a frothy cold foam topping infused with cinnamon. The aromatic flavors of tea and cinnamon create a refreshing and invigorating blend.
Remember, these are just starting points for your cold foam adventures. Don’t be afraid to get creative and try unexpected pairings. The possibilities are endless, and you never know which combination will become your new favorite.
| Topping | Best Pairing |
|---|---|
| Cocoa Powder | Iced Coffee or Chocolate Cold Drinks |
| Cinnamon | Cold Brew or Vanilla-Flavored Drinks |
| Caramel Drizzle | Cold Brew or Iced Caramel Latte |
Common Mistakes When Making Cold Foam
Don’t let simple mistakes get in the way of perfecting your cold foam – learn from these common pitfalls and achieve cafe-like results at home.
One of the most crucial mistakes people make when making cold foam is not using fresh and cold milk. Freshness is key to achieving the best foam consistency and taste. Make sure to check the expiration date of your milk and use it within the recommended timeframe. Additionally, chilling the milk before frothing is essential in order to achieve optimal results. Cold milk froths better and creates a denser foam, giving your cold beverages that irresistibly velvety texture.
Another common mistake is over-frothing or under-frothing the milk. Achieving the right consistency is crucial for a perfect cold foam. Over-frothing can result in large air bubbles and a thin foam that dissipates quickly, while under-frothing can lead to a flat and watery foam. Finding the balance between the two is key. Start by frothing the milk for about 15-20 seconds and adjust the time according to your desired foam consistency.
Lastly, many people make the mistake of adding flavorings too late in the process. If you want to infuse your cold foam with delicious flavors like vanilla or caramel, make sure to add the extracts or syrups before frothing the milk. This allows the flavorings to incorporate fully into the foam, giving you a well-rounded and flavorful experience.
| Common Mistakes: | Prevention: |
|---|---|
| Using milk that is not fresh or cold enough | Check the expiration date and chill the milk before frothing |
| Over-frothing or under-frothing the milk | Froth the milk for the appropriate time to achieve desired consistency |
| Adding flavorings too late in the process | Add flavorings before frothing to fully incorporate the flavors into the foam |
Techniques for Perfecting Cold Foam
Master the art of making cold foam with these tried-and-true techniques that will have you frothing like a pro in no time. Achieving the perfect consistency and texture is key to creating a velvety and frothy topping for your cold beverages. Follow these steps to create cold foam that will elevate your homemade brews to a new level of deliciousness.
- Milk Frothing: Start by pouring your cold, fresh milk into a milk frother. Make sure the frother is clean and free from any residue. Froth the milk using the frother’s designated setting or by following the manufacturer’s instructions. The ideal milk consistency for cold foam is thick and creamy with small bubbles.
- Achieving the Right Consistency: Pay close attention to the frothing process to avoid over-frothing or under-frothing the milk. Over-frothing can result in large bubbles and a thin consistency, while under-frothing may not create enough foam. Practice frothing until you achieve the desired texture and consistency.
- Timing the Flavorings: If you want to add flavor variations to your cold foam, such as vanilla or caramel, it’s important to add them at the right time. After frothing the milk to the desired consistency, add the flavorings and gently stir to incorporate them. This ensures that the flavors blend well with the foam and create a harmonious taste experience.
By following these techniques, you’ll be able to create cold foam that is creamy, frothy, and perfect for topping off your favorite cold beverages. Experiment with different milk types, flavorings, and drink combinations to discover your own signature cold foam creations. With a little practice and the right tools, you’ll be enjoying cafe-quality beverages at home in no time!
| Technique | Result |
|---|---|
| Milk Frothing | Thick and creamy foam with small bubbles |
| Achieving the Right Consistency | Avoid over or under-frothing for optimal texture |
| Timing the Flavorings | Incorporates flavors well into the foam |
Enjoying Cafe-Quality Beverages at Home
With the right knowledge and tools, you can enjoy the luxurious experience of cafe-quality beverages right in the comfort of your own home. One of the key elements to achieving this is mastering the art of making cold foam. This frothy and velvety topping adds a delightful touch to your favorite cold coffee drinks, elevating them to a whole new level of indulgence.
To create perfect cold foam at home, start with the freshest and coldest milk you can find. Skim milk, with its higher protein content, is the ideal choice for achieving a thick and creamy foam. However, if you prefer plant-based options, they can also be used, although the results may vary slightly.
When it comes to tools, a milk frother is your best friend. It ensures a consistent and airy foam that is hard to replicate with other methods. However, if you don’t have a milk frother, a French press or a whisk can be used as alternatives, although they may not produce the same level of foaminess.
Once you have mastered the basic technique, you can start experimenting with flavor variations. Add a touch of vanilla or caramel extract to infuse your cold foam with a delightful aroma. Alternatively, try mixing in some flavored syrups to create your own signature blend. The possibilities are endless, and you can let your creativity run wild.
| TIP |
|---|
| For an extra special touch, top off your cold foam creation with a sprinkle of cocoa powder, a dash of cinnamon, or a drizzle of caramel. These simple additions add an extra layer of flavor and visual appeal to your homemade cafe-quality beverages. |
So why wait in long lines or spend a fortune at the coffee shop when you can enjoy the same delightful experience at home? By mastering the art of making cold foam, you can create your own personalized cold coffee drinks, tailored to your taste preferences. So go ahead, grab your favorite cup, and start your journey to cafe-quality beverages in the comfort of your own kitchen.
Conclusion
Making cold foam at home is a delightful and rewarding skill that allows you to enhance your homemade brews with a touch of luxury. Cold foam, with its frothy and velvety texture, adds a decadent twist to your favorite cold coffee drinks. Whether it’s an iced coffee, a cold brew, or even an iced tea, cold foam turns an ordinary beverage into a cafe-quality treat.
Creating the perfect cold foam is easier than you might think. All you need is some cold and fresh milk, preferably skim milk for that thick and creamy foam. If you prefer plant-based milks, you can experiment with them too, but keep in mind that the results may vary.
To make cold foam, a milk frother is the ideal tool. It helps achieve the perfect consistency and ensures that the foam is light and airy. However, if you don’t have a milk frother, you can still enjoy cold foam by using alternatives like a French press or a whisk. Just keep in mind that the results may not be as consistent as with a milk frother.
Once you’ve mastered the art of making cold foam, you can get creative with flavor variations. Add extracts or syrups to infuse your foam with different tastes and aromas. Whether it’s a hint of vanilla, a touch of caramel, or a sprinkle of cocoa powder, these flavorings will take your cold foam to the next level.
So why settle for ordinary when you can enjoy the luxury of cafe-quality beverages right at home? Start mastering the art of making cold foam and savor the satisfaction of creating your own frothy, velvety topping for your homemade brews. With the right techniques and tools, you’ll be able to indulge in a truly decadent coffee experience, all from the comfort of your own kitchen.
FAQ
Q: What is cold foam?
A: Cold foam is a frothy and velvety topping that adds a luxurious touch to cold coffee drinks. It is made by frothing nonfat milk without the use of heat or steam.
Q: What kind of milk works best for making cold foam?
A: Skim milk works best for creating a thick and creamy foam due to its higher protein content. Plant-based milks can also be used, but the results may vary.
Q: What tools do I need to make cold foam at home?
A: To make cold foam at home, you will need cold, fresh milk and a milk frother. Other tools like a French press or a whisk can be used, but they may not yield the same results.
Q: Can I add flavor variations to cold foam?
A: Yes, you can add flavor variations to cold foam using extracts or syrups. This allows you to customize the taste of your foam to your liking.
Q: What drinks can I top with cold foam?
A: Cold foam can be used to top a variety of drinks, including iced coffee, cold brew, iced tea, and more. It adds a delicious and creamy element to any cold beverage.
Q: What are some common mistakes when making cold foam?
A: Common mistakes include using milk that is not fresh or cold enough, over or under-frothing the milk, and adding flavorings too late in the process.
Q: How can I achieve the perfect cold foam consistency?
A: The key to achieving the perfect cold foam consistency is in the milk frothing technique. Froth the milk to the desired thickness and incorporate any flavorings at the right time in the process.
Q: Can I enjoy cafe-quality beverages at home with homemade cold foam?
A: Absolutely! By mastering the art of making cold foam at home, you can enjoy cafe-quality beverages right in your own kitchen. Get creative and experiment with different drink combinations to find your favorite.