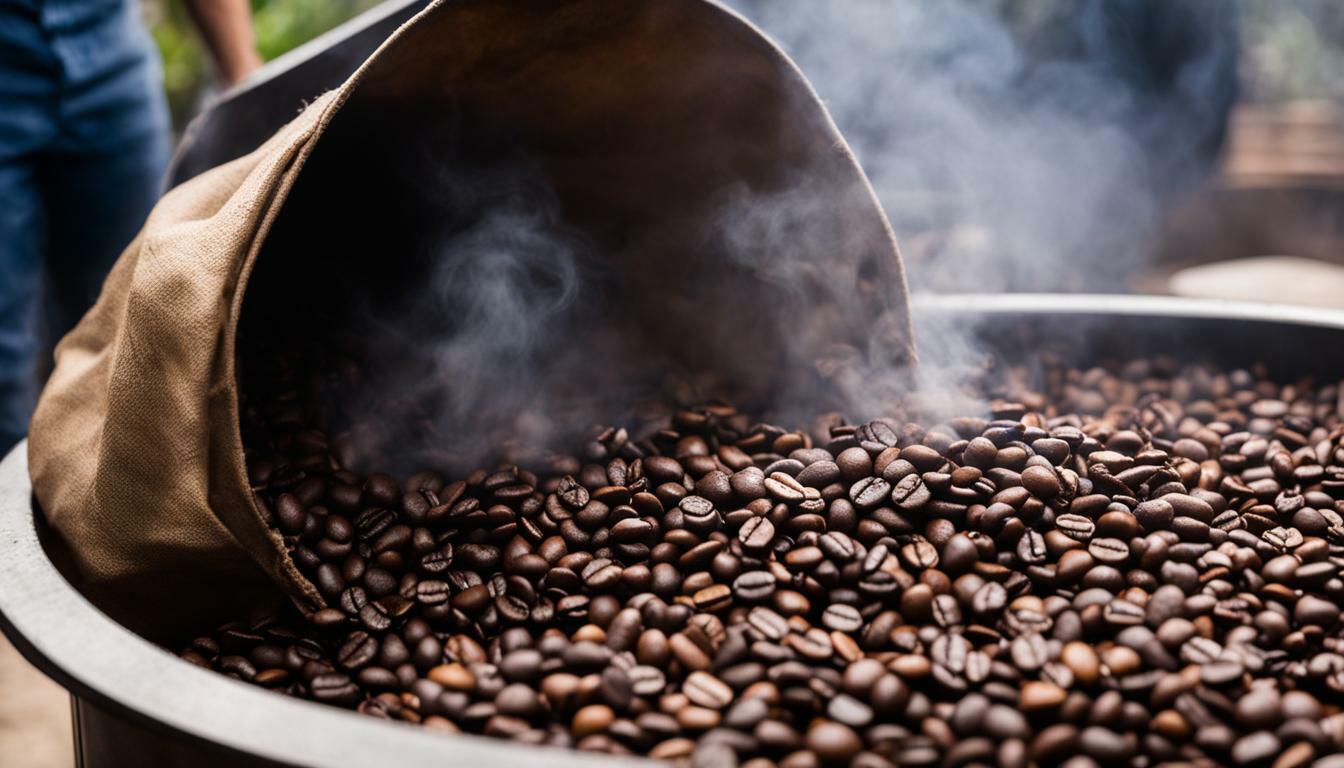
Discover the art of roasting coffee beans on a smoker and elevate your morning brew to a whole new level of flavor. Roasting coffee beans on a smoker is a unique and innovative way to infuse your coffee with smoky flavors. It may sound unusual, but it’s actually a simple process that yields striking results. By taking control of the roasting process, you can create unique flavors and aromas that will impress your friends and leave you with a delicious cup of coffee.
Key Takeaways:
- Roasting coffee beans on a smoker can add smoky flavors to your brew.
- Heat up your smoker and tend to the beans every five minutes to avoid over-smoking.
- Stir the beans every six to ten minutes to ensure even smoking.
- Let the roasted coffee beans cool and aerate for at least ten hours.
- Store the beans in a tightly sealed container in a cool, dark area.
The Basics of Smoking Coffee Beans
Before we dive into the specifics, let’s explore the basic techniques of roasting coffee beans on a smoker. Roasting coffee beans on a smoker is a unique and innovative way to infuse your morning brew with smoky flavors. It may sound unusual, but it’s actually a simple process that yields striking results.
To roast coffee beans on a smoker, you’ll need to heat up your smoker to its highest setting, typically between 350 to 450 degrees Fahrenheit. This high heat is crucial for achieving the desired flavor profile. Once your smoker is hot, it’s important to tend to the beans every five minutes to avoid over-smoking.
Next, place the green coffee beans on a tray in a single layer and insert them into the smoker. Stir the beans every six to ten minutes to ensure even smoking. It’s important to be efficient when opening the smoker door to maintain the high heat inside.
As the beans roast, you’ll need to pay attention to their crack level. This refers to the sound the beans make as they expand and release moisture. The desired crack level varies depending on personal preference, but it’s typically identified by a series of crackling sounds. Once the beans reach your desired crack level, remove them from the smoker and let them cool and aerate for at least ten hours. This allows excess carbon dioxide to escape and enhances the flavor of the beans.
| Roasting Level | Description |
|---|---|
| Light Roast | Light brown color, mild flavor, retains more of the original characteristics of the bean |
| Medium Roast | Moderate brown color, balanced flavor with slightly less acidity, smooth and well-rounded taste |
| Dark Roast | Dark brown to almost black color, bold and intense flavor, lower acidity, prominent smoky notes |
Once your coffee beans are roasted to perfection, it’s important to store them properly. Place them in a tightly sealed container and store in a dark and cool area. Avoid exposing the beans to natural light and intense heat, as these can compromise their flavor and freshness.
Now that you understand the basics of roasting coffee beans on a smoker, you’re ready to embark on your smoky coffee journey. Get creative and experiment with different woods, roasting times, and crack levels to customize the flavor and intensity of your coffee. Roasting or smoking coffee beans on a smoker is a fun and rewarding way to elevate your coffee experience, delivering a rich and uniquely flavored cup of joe.
Smoking Green Coffee Beans
Smoking green coffee beans is the first crucial step in unlocking the smoky flavors that will transform your coffee experience. By subjecting the beans to the aromatic smoke of a smoker, you can infuse them with unique and delicious flavors that traditional roasting methods cannot achieve. The process is simple and requires minimal equipment, making it accessible to coffee enthusiasts of all levels.
To smoke green coffee beans, start by preheating your smoker to a temperature of 225 to 250 degrees Fahrenheit. This low and slow method allows the beans to gradually absorb the smoky flavors without becoming overly charred. Spread the green coffee beans in a single layer on a metal tray or mesh screen, ensuring they have enough space to move around and evenly smoke.
| Step | Instructions |
|---|---|
| 1 | Place the green coffee beans on a metal tray or mesh screen, ensuring they are in a single layer. |
| 2 | Insert the tray of green coffee beans into the preheated smoker. |
| 3 | Close the smoker and let the beans smoke for approximately 45 to 60 minutes. |
| 4 | Periodically check and stir the beans to ensure even smoking. |
| 5 | Once the beans reach your desired level of smokiness, remove them from the smoker and let them cool. |
While smoking green coffee beans, it’s important to monitor the process and adjust the smoking time based on your preference. The longer the beans are exposed to the smoke, the richer and more pronounced the smoky flavors will be. Experimenting with different smoking times can help you achieve the perfect balance of smokiness that suits your taste.
Smoky Flavor Tips:
- Try using different types of wood chips or chunks to create unique smoky flavors. Popular options include hickory, mesquite, apple, and cherry.
- Consider blending different wood varieties to create your own signature smoky flavor profile.
- Allow the smoked beans to rest for at least 24 hours before grinding and brewing to allow the flavors to fully develop.
- Store the smoked coffee beans in an airtight container in a cool, dark place to preserve their freshness and flavor.
Smoking green coffee beans opens up a world of possibilities for coffee lovers who crave a rich, smoky taste in their daily brew. By mastering this simple technique, you can elevate your coffee experience and impress your taste buds with flavors that are truly unique and unforgettable.
References:
Green coffee beans, https://www.coffeebean-direct.co.uk
Coffee Smoking Guide
This is a brief guide on how to smoke coffee beans to achieve that perfect flavor you seek. First, you’ll want to gather all the necessary equipment and ingredients.
Here’s what you’ll need:
- Green coffee beans
- A smoker
- Wood chips or chunks for smoking
- A metal tray or mesh screen
- A thermometer
Once you have everything ready, it’s time to begin the smoking process. Follow these steps:
- Preheat your smoker to a temperature of around 225 to 250 degrees Fahrenheit.
- Spread the green coffee beans in a single layer on a metal tray or mesh screen.
- Place the tray of green coffee beans in the preheated smoker.
- Let the beans smoke for approximately 45 to 60 minutes, ensuring to periodically check and stir them for even smoking.
- Once the beans reach your desired level of smokiness, remove them from the smoker and let them cool.
Remember, the longer you smoke the beans, the stronger the smoky flavor will be. Experiment with different smoking times to find your preferred level of intensity.
It’s important to note that smoking coffee beans gives them a unique and distinct flavor. If you prefer a milder taste, consider using less smoking time or a lighter wood variety, such as apple or cherry. For a more robust smoky flavor, opt for longer smoking times and heavier woods like hickory or mesquite.
| Wood Variety | Smoke Intensity | Recommended Smoking Time |
|---|---|---|
| Apple | Light | 30-45 minutes |
| Cherry | Light | 30-45 minutes |
| Hickory | Medium | 45-60 minutes |
| Mesquite | Strong | 60+ minutes |
Once the beans have cooled, store them in an airtight container to preserve the flavor. Allow the beans to rest for at least 24 hours before grinding and brewing. This resting period allows the smoky flavors to fully develop, resulting in a truly satisfying cup of coffee.
By following these simple steps and experimenting with different smoking times and wood varieties, you can unlock a world of smoky flavors in your coffee. Enjoy the process and savor the rich and distinct taste that smoking coffee beans offers.
Achieving the Perfect Roast Level
Understanding the crack level of your coffee beans is essential for achieving the perfect roast and unlocking the ideal flavors. When coffee beans are roasted, they go through a process called the “crack.” This refers to the sound the beans make as they heat up and release moisture, resulting in a significant transformation of flavor.
To determine the crack level, you need to listen closely during the roasting process. There are two distinct cracks: the first crack and the second crack. The first crack sounds like popcorn popping and occurs when the beans have reached a light to medium roast level. This stage produces a bright and acidic flavor profile.
The second crack is more subtle and resembles the sound of Rice Krispies cereal. It signifies that the beans have reached a darker roast level. This stage brings out bolder and more complex flavors, often accompanied by smoky and chocolatey notes.
| Roast Level | Crack Level | Flavor Characteristics |
|---|---|---|
| Light | First Crack | Bright, acidic, fruity |
| Medium | First Crack | Balanced, medium-bodied |
| Medium-Dark | Between First and Second Crack | Rich, complex, slight smokiness |
| Dark | Second Crack | Bold, intense, chocolatey |
It’s important to note that the crack level is subjective, and you can adjust the roasting time based on your personal preferences. If you prefer a lighter roast, you can stop the process after the first crack. For a darker roast, you can allow the beans to reach the second crack or even go beyond it, although be cautious not to over-roast them.
Roast Level Recommendations:
- Light Roast: Ideal for showcasing the natural flavors of the coffee beans.
- Medium Roast: Strikes a balance between acidity and sweetness.
- Medium-Dark Roast: Offers a complex flavor profile with a hint of smokiness.
- Dark Roast: Provides a bold and intense coffee experience with strong chocolate notes.
Remember, experimenting with different roast levels and crack stages will allow you to discover your preferred flavor profiles. By understanding the crack level and its impact on the final result, you can confidently roast coffee beans on a smoker to unlock the perfect roast level and achieve your desired flavor intensity.
Cooling and Storing the Roasted Coffee Beans
Once you have achieved the desired roast level, it’s crucial to cool and store the beans correctly to maintain their quality and flavor.
After removing the roasted coffee beans from the smoker, allow them to cool and aerate for at least ten hours. This resting period allows excess carbon dioxide to escape, resulting in a smoother and more balanced flavor profile. Spread the beans out on a cooling tray or a wide, shallow container to facilitate even cooling.
Once the beans have cooled, it’s time to store them. Transfer the roasted coffee beans to a tightly sealed container that can protect them from light, air, and moisture. Mason jars or airtight coffee storage containers are excellent options. Avoid using regular plastic bags, as they may not provide adequate protection against air and light.
For optimal freshness and flavor retention, store the coffee beans in a cool, dark place. Exposure to heat and sunlight can accelerate the staling process and diminish the coffee’s quality. A pantry or cabinet away from direct sunlight works well. Avoid storing the beans in the refrigerator or freezer, as the moisture and aromas in these environments can compromise the flavor.
| Storage Tips: |
|---|
| Keep the beans in a cool, dark place |
| Avoid exposure to heat and direct sunlight |
| Store in an airtight container |
| Avoid storing in the refrigerator or freezer |
Remember that coffee is best enjoyed within a few weeks of roasting, as the flavors and aromas are at their peak. However, if you have roasted a large batch and don’t plan on consuming it all within that timeframe, you can extend the freshness by freezing the beans.
When freezing roasted coffee beans, divide them into smaller portions and store each portion in an airtight freezer bag. This way, you can thaw only what you need without exposing the entire batch to repeated temperature fluctuations.
By following these guidelines for cooling and storing your freshly roasted coffee beans, you can preserve their quality and enjoy a flavorful cup of coffee each morning. So, take the time to savor the experience and discover the full potential of your smoked and roasted coffee beans.
Grinding the Roasted Coffee Beans
The grind of your coffee beans plays a significant role in the flavor and smoothness of your cup of joe. Let’s explore the various grind types and how to achieve the perfect grind for your preferences.
When it comes to grinding roasted coffee beans, there are several options to consider. The grind size you choose will depend on the brewing method you prefer. For coarser grinds, like extra coarse or coarse, it’s ideal for methods like French press or cold brew. These grinds allow for a slower extraction process that brings out the bold flavors and aromas of the coffee.
On the other hand, if you’re brewing espresso, a finer grind is necessary to maximize the extraction and create a rich, concentrated shot. Medium grinds work well for drip coffee makers, while fine grinds are suitable for pour-over methods like the Hario V60 or Chemex. If you enjoy Turkish coffee, which is brewed with finely ground beans, an extra fine grind is needed.
It’s essential to invest in a quality burr grinder for consistent and precise grinding. Blade grinders can create uneven particle sizes, leading to an inconsistent extraction and potentially bitter or weak coffee. Burr grinders allow you to adjust the grind size and ensure uniformity, resulting in a better-tasting cup.
| Grind Type | Brewing Method |
|---|---|
| Extra Coarse | French Press, Cold Brew |
| Coarse | French Press, Cold Brew |
| Medium | Drip Coffee Maker |
| Fine | Pour-Over Methods (Hario V60, Chemex) |
| Extra Fine | Turkish Coffee |
Remember, the grind size is just one element that influences the taste of your coffee. Factors like the quality of the beans, water temperature, and brew time also contribute to the overall flavor. So, don’t be afraid to experiment and adjust these variables to achieve the perfect cup of coffee that suits your taste buds.
Smoking Ground Coffee on a Smoker
If you prefer the convenience of pre-ground coffee, you can still enjoy the smoky flavors by smoking the grounds on a smoker. It’s a simple process that adds a unique twist to your morning brew.
To smoke ground coffee, start by placing the grounds in a small cast iron skillet on the smoking grate of your smoker. Make sure the grounds are spread out in an even layer to maximize exposure to the smoke.
Preheat your smoker to a temperature of around 225 degrees Fahrenheit. Once the smoker is heated, place the skillet with the coffee grounds on the grate. Allow the grounds to smoke for about 30 minutes.
During the smoking process, stir the grounds every five minutes to ensure that all sides are exposed to the smoke. This helps to evenly infuse the coffee with the smoky flavors.
| Step | Time |
|---|---|
| Place grounds in skillet | |
| Preheat smoker | |
| Smoke for 30 minutes | |
| Stir every 5 minutes |
Once the smoking time is complete, remove the skillet from the smoker and let the smoked coffee grounds cool. Store the grounds in an airtight container for at least 24 hours to allow the flavor to intensify.
The result is a rich and aromatic coffee with a hint of smokiness. Experiment with different types of wood chips to add unique flavors and create your own signature blend.
Smoking ground coffee on a smoker is a great way to infuse your morning brew with smoky flavors.
Smoking Coffee Beans on a Pellet Grill
For those who have a pellet grill, it can be an excellent alternative for smoking coffee beans and infusing them with rich, smoky flavors. The controlled temperature and consistent smoke production make it an ideal tool for achieving the perfect roast.
To smoke coffee beans on a pellet grill, preheat the grill to 225 degrees Fahrenheit. This low and slow cooking process will allow the beans to absorb the smoky flavors while retaining their natural characteristics. Make sure to use a smoke-enhancing wood pellet, such as hickory or mesquite, to further enhance the flavor profile.
Place the green coffee beans on a baking sheet or in a cast iron pan, ensuring a single layer for even smoking. Insert the beans into the grill and close the lid. Maintain a steady temperature throughout the smoking process by monitoring the pellet grill’s settings and adjusting airflow if necessary.
Smoke the coffee beans for at least three hours, periodically checking their internal temperature. It’s recommended to reach an internal temperature of 165 degrees Fahrenheit for perfectly roasted coffee beans. Once the beans reach this temperature, remove them from the grill and let them cool and rest for a few days to allow the smoky flavors to fully develop.
| Pellet Grill Smoking Tips |
|---|
| Use a smoke-enhancing wood pellet for optimal flavor. |
| Monitor the temperature and adjust airflow as needed to maintain consistency. |
| Keep the coffee beans in a single layer for even smoking. |
| Check the internal temperature of the beans to ensure they are fully roasted. |
| Allow the smoked coffee beans to cool and rest for a few days to let the flavors develop. |
Smoking coffee beans on a pellet grill opens up a world of possibilities for creating unique and flavorful brews. With a little experimentation and patience, you can unlock a whole new depth of taste that will impress even the most discerning coffee connoisseur.
Maximizing Smoke Flavor and Customizing Your Coffee
By exploring different smoking woods and allowing the coffee beans to rest, you can discover a world of customized flavors and create a truly unique coffee experience. Each type of wood imparts its own distinct smoky notes, adding depth and complexity to your brew. Here are some popular options to consider:
| Wood Type | Flavor Profile |
|---|---|
| Hickory | Strong and bold with a hint of sweetness |
| Apple | Subtle and slightly fruity |
| Cherry | Mild and fruity |
When smoking coffee beans, it’s important to let them rest for several days after roasting. This resting period allows the beans to fully develop their flavors and allows the smoky notes to integrate harmoniously. During this time, the flavors mellow and intensify, resulting in a more balanced and nuanced cup of coffee.
For a truly unique coffee profile, you can also experiment with different blends of smoked and non-smoked beans. Combining different roast levels and flavors will give your coffee a one-of-a-kind taste that suits your personal preferences.
Customizing Your Brew
Once you’ve roasted and smoked your coffee beans, it’s time to brew and savor the fruits of your labor. Here are some tips to customize your brew and enhance your coffee experience:
- Adjust your grind size to control the extraction and strength of your coffee. A coarser grind will result in a more mellow and less bitter cup, while a finer grind will yield a stronger and more robust flavor.
- Experiment with brewing methods such as pour-over, French press, or espresso to highlight different aspects of the coffee’s flavor profile.
- Consider adding complementary flavors such as cinnamon, vanilla, or caramel to enhance the smoky notes of your coffee.
Remember, the beauty of roasting and smoking coffee beans on a smoker lies in the ability to customize and explore different flavors. Enjoy the process, embrace your creativity, and savor the rich, smoky flavors in every cup!
Conclusion
Roasting coffee beans on a smoker is a fun and fulfilling process that allows you to unlock rich, smoky flavors and elevate your coffee to new heights of enjoyment. By taking control of the roasting process, you can create unique flavors and aromas that will impress your friends and leave you with a delicious cup of coffee.
Whether you choose to smoke green coffee beans or pre-ground coffee, the key is to maintain optimal temperature and smoke levels throughout the roasting process. By following the steps outlined in this article, you can ensure that your coffee beans are evenly smoked and reach the desired crack level for the perfect roast.
After smoking, it’s important to let the roasted coffee beans cool and aerate for several hours to allow excess carbon dioxide to escape. Properly storing the beans in a sealed container, away from light and heat, will help preserve their flavor and freshness for longer periods.
If you’re looking to experiment even further, you can try using different types of wood for smoking, such as hickory, apple, or cherry, to add varying levels of smoky notes to your coffee. Resting the beans for a few days after smoking will intensify the smoke flavor and allow you to fully customize your coffee experience.
So, why not give roasting or smoking coffee beans on a smoker a try? It’s a rewarding and enjoyable process that will not only enhance the flavor of your coffee but also impress your taste buds. Unlock a world of smoky goodness and savor each sip of your perfectly roasted cup of joe.
FAQ
Q: How do I roast coffee beans on a smoker?
A: To roast coffee beans on a smoker, heat up your smoker to its highest setting, place the green coffee beans on a tray, and insert them into the smoker. Stir the beans every six to ten minutes and remove them when they reach your desired crack level.
Q: How long do I let the roasted coffee beans cool and aerate?
A: It’s recommended to let the roasted coffee beans cool and aerate for at least ten hours to allow excess carbon dioxide to escape.
Q: How should I store the roasted coffee beans?
A: Store the roasted coffee beans in a tightly sealed container in a dark and cool area, avoiding exposure to natural light and intense heat.
Q: How do I grind the roasted coffee beans?
A: Different grind types produce unique flavors and aromas. Choose from extra coarse, coarse, medium, fine, extra fine, and Turkish grinds, depending on your preference.
Q: Can I smoke ground coffee on a smoker?
A: Yes, you can smoke ground coffee on a smoker. Place the grounds in a small cast iron skillet on the grill, smoke for 30 minutes, and then store the smoked coffee grounds in an airtight container for at least 24 hours to allow the flavor to intensify.
Q: Can I use a pellet grill to smoke coffee beans?
A: Yes, you can use a pellet grill to smoke coffee beans. Preheat the grill to 225 degrees Fahrenheit and let the beans smoke for at least three hours, ensuring the internal temperature reaches 165 degrees Fahrenheit.
Q: How can I maximize the smoke flavor in my coffee?
A: Experiment with different woods like hickory, apple, or cherry to vary the smoky notes. Rest the coffee beans for several days to maximize the smoke flavor.
Q: What are the benefits of roasting coffee beans on a smoker?
A: Roasting coffee beans on a smoker allows you to customize the flavor and intensity of your coffee, creating unique flavors and aromas. It is a fun and rewarding way to elevate your coffee experience.